West Ham United were held to a frustrating 0-0 draw by Bournemouth at London Stadium, a result that leaves the Hammers tantalizingly close yet still just shy of Premier League safety. Despite dominating large portions of the match and creating a host of opportunities, West Ham were unable to convert their attacking superiority into goals, while Bournemouth’s disciplined defensive display ensured they walked away with a valuable point.
This stalemate highlighted West Ham’s attacking promise but also underscored their finishing inefficiency, tactical rigidity in the final third, and the thin margins that can define results in crucial survival battles. For Bournemouth, the point reflects defensive resilience, tactical discipline, and effective game management, even when outplayed for long stretches.
Pre-Match Context
West Ham entered the fixture under pressure, desperate to climb out of the relegation zone. Manager David Moyes emphasized intensity, clinical finishing, and maintaining defensive balance. With only a few matches remaining in the season, every point was critical, and London Stadium provided an ideal setting for a high-stakes performance.
Bournemouth, managed by Andoni Iraola, arrived with a pragmatic approach. The Cherries aimed to frustrate West Ham, maintain a compact shape, and capitalize on counter-attacking opportunities. They were well aware that avoiding defeat against a direct relegation rival would be almost as valuable as a victory in the fight for survival.
The atmosphere at London Stadium was electric, with fans vocal from the first whistle. West Ham supporters were eager to see their team translate dominance into a decisive win, while Bournemouth fans were prepared to cheer every defensive intervention that kept their side in the game.
West Ham’s Tactical Setup
West Ham lined up in a 4-2-3-1 formation, focusing on controlling possession, creating overloads in attacking areas, and using width to stretch Bournemouth’s defensive lines. The wingers were tasked with penetrating behind the backline, while the central attacking midfielder operated as a creative fulcrum to link the midfield and forward lines.
The double pivot in midfield had dual responsibilities: provide cover for the defense and drive attacks with incisive passes. Full-backs were instructed to push forward and support wide play, creating crossing opportunities while maintaining defensive awareness in case of turnovers.
Defensively, West Ham aimed to press selectively, maintain compact lines, and minimize space between midfield and defense. Goalkeeper Alphonse Areola played a critical role in organizing the backline and commanding the penalty area during Bournemouth’s rare attacks.
Bournemouth’s Tactical Setup
Bournemouth adopted a 5-4-1 formation, prioritizing defensive solidity and compactness. The back five formed a disciplined wall in central areas, forcing West Ham to attack from wider channels and take lower-percentage shots.
The midfield quartet focused on covering passing lanes, supporting the backline, and providing quick transitions for counter-attacks. The lone striker stayed alert for breaks, ready to exploit any errors from the Hammers.
Defensively, Bournemouth concentrated on organization, minimizing gaps between defenders, and blocking central passing routes. Their aim was to frustrate West Ham’s attacking flow and maintain resilience under sustained pressure.
First-Half Dynamics
West Ham began the match with an assertive approach, dominating possession and probing Bournemouth’s defensive lines. Early crosses, through balls, and shots from distance tested the Cherries’ backline, but Bournemouth remained composed and well-organized.
Despite West Ham’s attacking dominance, clear-cut chances were limited initially. Bournemouth absorbed pressure, maintained compactness, and blocked several key opportunities. Their defensive discipline forced West Ham to recycle possession, shift play, and attempt riskier shots from distance.
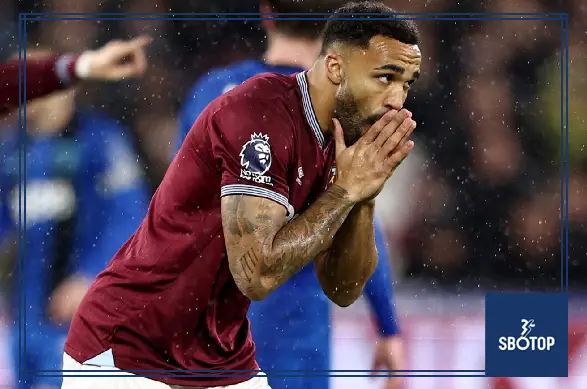
The first half featured several notable chances for the Hammers. Winger Jarrod Bowen made threatening runs into the box, delivering crosses that were either intercepted or narrowly missed by the forward line. Central striker Michail Antonio linked play effectively but was often crowded out by the disciplined Bournemouth defense.
Bournemouth’s strategy was effective in frustrating West Ham, ensuring that despite possession dominance, the game remained goalless at halftime. The visitors relied on tight marking, coordinated pressing in midfield, and clear communication to prevent defensive lapses.
Second-Half Developments
The second half saw West Ham increase intensity, recognizing the need to break the deadlock. Their possession remained high, with full-backs advancing aggressively and midfielders making late runs into the box.
Bournemouth responded by remaining disciplined, occasionally pressing higher in the midfield to disrupt West Ham’s rhythm, but always retreating into a compact defensive block when necessary. Their resilience forced West Ham to attempt more speculative shots, with Areola remaining largely untested.
West Ham created multiple high-quality opportunities in the 60th and 70th minutes. Antonio had a header cleared off the line, Bowen’s curling effort narrowly missed the top corner, and a late chance from a corner delivery was blocked by the defensive line. Despite repeated pressure, Bournemouth’s defensive focus and concentration held firm.
As the clock wound down, West Ham’s urgency increased. Substitutions added fresh legs and attacking options, but even these changes could not break Bournemouth’s organized structure. The final whistle confirmed a 0-0 stalemate, leaving West Ham with points dropped but still within touching distance of safety.
Tactical Analysis
Several tactical insights emerged from the match:
- Defensive Discipline Wins Points: Bournemouth’s compact shape, disciplined marking, and coordination frustrated West Ham’s attackers and prevented clear-cut chances from being converted into goals.
- Counter-Attacking Threat: Bournemouth remained a danger on the break, and while West Ham dominated possession, they were wary of leaving gaps exposed.
- Attacking Inefficiency: West Ham created numerous opportunities but lacked finishing precision and composure in critical moments.
- Midfield Battles: Control of central areas was crucial, with West Ham dominating possession but Bournemouth effectively disrupting passing lanes and intercepting key deliveries.
Player Performances and Key Contributions
-
West Ham Key Players
-
-
- Michail Antonio: Provided link-up play, held up the ball effectively, and created opportunities for teammates.
- Jarrod Bowen: Threatened Bournemouth’s backline with intelligent runs and dangerous crosses.
- Midfielders: Controlled tempo and recycled possession, though final delivery lacked sharpness.
-
-
Bournemouth Key Players
- Goalkeeper: Made several key saves and commanded the area under sustained pressure.
- Defensive Line: Maintained discipline, blocked shots, and organized the backline to prevent gaps.
- Midfielders: Disrupted West Ham’s rhythm and supported quick counter-attacking transitions.
Fan Reactions and Atmosphere
London Stadium was filled with tension, as fans experienced a mix of frustration and hope throughout the match. West Ham supporters were visibly frustrated by missed opportunities and the inability to break through a well-drilled Bournemouth defense. Conversely, Bournemouth fans celebrated their team’s defensive resilience, recognizing the value of a point away from home.
Social media discussions mirrored these reactions, praising Bournemouth’s tactical execution and defensive discipline while critiquing West Ham’s inefficiency in front of goal. Analysts highlighted the importance of composure in the final third and the psychological pressure of fighting for survival.
Managerial Insights
David Moyes acknowledged West Ham’s dominance and creation of multiple opportunities but emphasized the need for composure and finishing in crucial moments. He highlighted the importance of learning from such stalemates and maintaining focus in upcoming fixtures to secure safety.
Andoni Iraola praised Bournemouth’s defensive organization and collective effort. He noted the team’s discipline in absorbing pressure and the value of earning a point against a high-possession opponent in a crucial relegation battle.
Implications for West Ham
The draw has several implications for West Ham:
- Points Dropped: Despite controlling much of the match, failure to score means they remain perilously close to the relegation zone.
- Need for Clinical Finishing: Improving composure in front of goal is crucial to converting dominance into victories.
- Tactical Lessons: Breaking down compact defenses requires creativity, varied attacking strategies, and precise execution.
- Psychological Impact: Maintaining confidence despite missed opportunities is essential in high-pressure survival scenarios.
Implications for Bournemouth
For Bournemouth, the point earned has positive takeaways:
- Defensive Validation: Compactness and discipline proved effective against a technically superior opponent.
- Momentum and Morale: Securing a point away from home boosts confidence in the fight to maintain league position.
- Tactical Effectiveness: The match validates the strategy of absorption, organization, and selective counter-attacking.
Broader Premier League Context
The match reflects the fine margins in relegation battles. Teams may dominate possession and create numerous chances yet still leave points behind if finishing is inefficient. Conversely, disciplined and organized defensive performances can yield valuable points, even against technically superior sides.
For survival battles, the psychological dimension is critical: resilience, composure under pressure, and the ability to capitalize on key moments often define whether a team stays in the league. West Ham’s stalemate highlights the need for consistent attacking execution, while Bournemouth’s performance underscores the value of defensive discipline.
Also Read:


